
This past weekend I was able to finish up a project that I had been slowly working on. Since Auburn played away and Brandon made a weekend trip to the hunting camp, I had a weekend to myself to get whatever done I needed! I am so glad I devoted the weekend to getting these curtains up, because I so happy with them (for now)!
Melrose's double kitchen window looks straight into the neighbors house and has been itching for some cover up. As you know, I like things simple and monotone so I didn't want anything too busy or fussy. Mom found this picture in my New Farmhouse Style book by Terry Woods and it was instant inspiration:

Mom and I discussed how I could achieve this vintage, worn look and we decided with tea bags! So, I purchased some white linen fabric, cut them into panels, dyed them, hung them to dry, hemmed them, and voila! Here are some pictures from my process and the end result.


Not that this is super cool, but if you are interested -- I boiled some water, steeped the tea bags for about 5 minutes, removed, then let the fabric soak.

I hung them to dry outside and then measured the correct length for them to hit the window sill and pinned up the excess. I hemmed the bottom and cut off the remaining fabric.

For a little interest I made a top ruffle. I folded about 1" over and then stitched right along the fold so that there was a small open path for the wire to slide through. I tried to get the stitch as close to the fold as I could so that the wire would be tight in the opening and not allow too much slack.
I slid the wire through the pockets and attached the wire to the hooks in the window frame. They looked great, but I needed something else. So, I hung this beautiful lamb's ear wreath that I bought at the Country Living Fair to the center of the window. And now this is Melrose's kitchen:

check out the blue mason jars ... sugar, coffee beans, and brown rice.


This is an antique table I bought at Hanna's Antiques downtown Birmingham. My friend Catherine and I carted it from the store to the house without any guy's help! I purchased these stools at Overstock and it is the perfect breakfast nook.

I think the table was made from an old wagon wheel? Not sure where the iron stand is from.

A tea cup made into a candle - a cute take home gift from a shower.
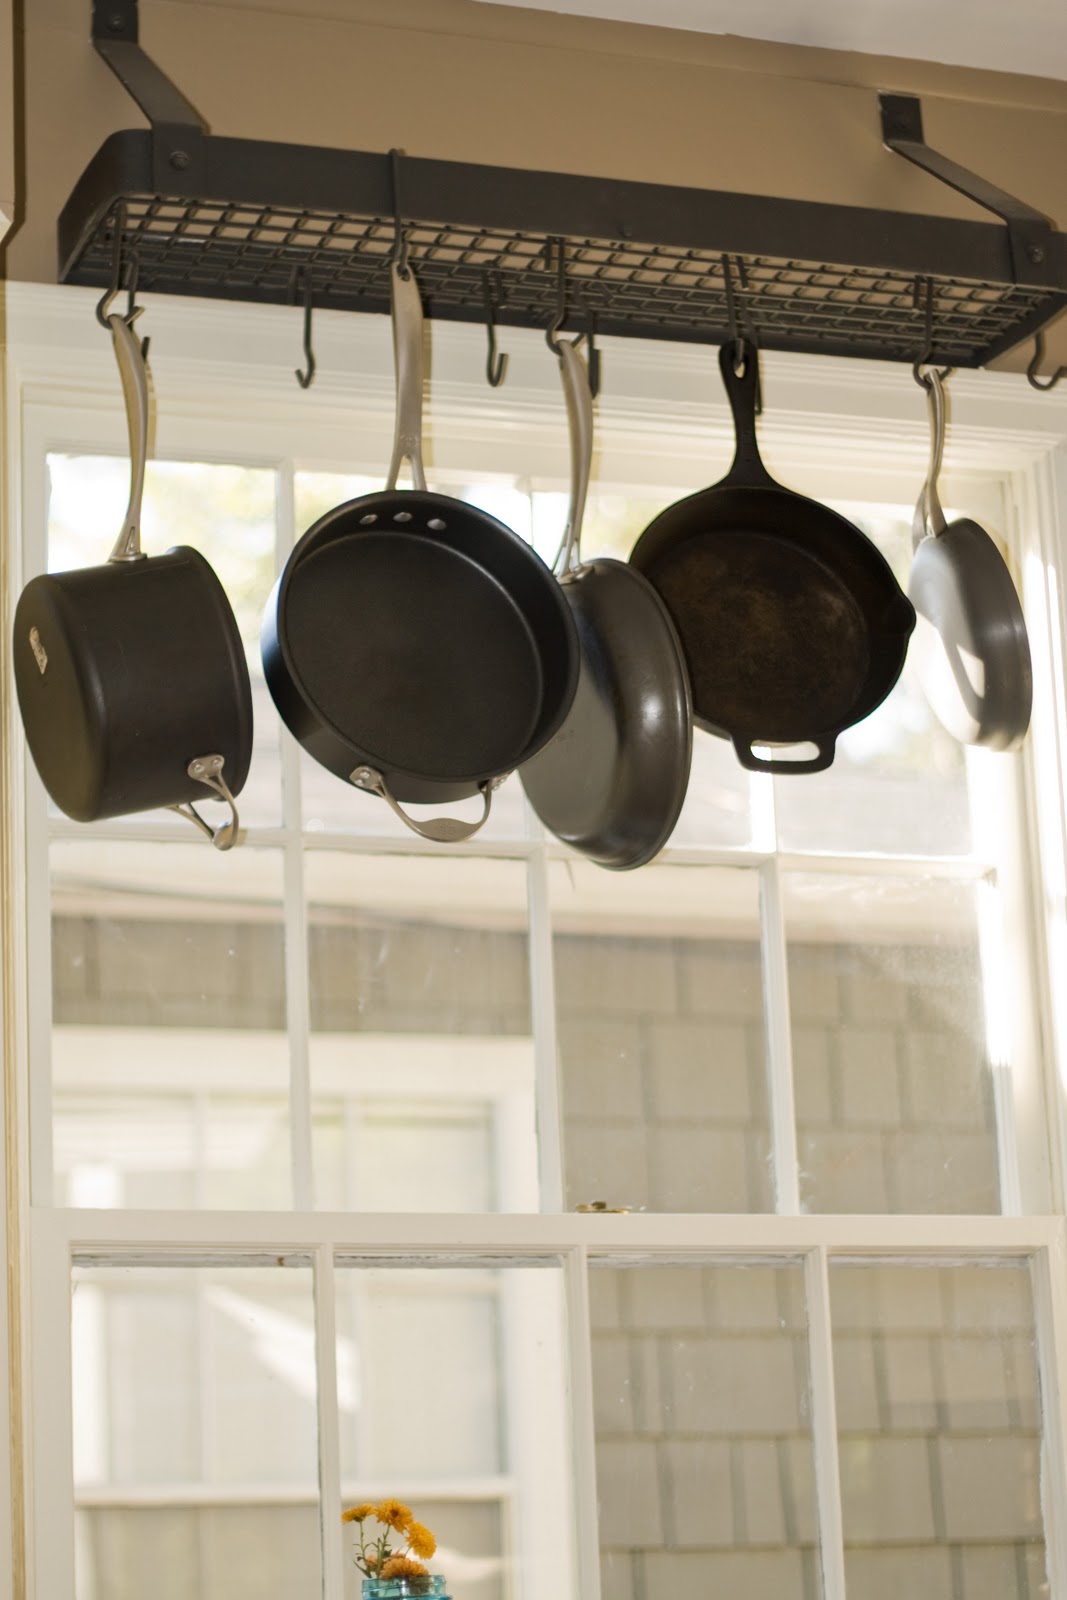
Cast iron pot rack over the table -- I was uneasy about this at first, I think I was concerned it would look too "messy", but I have come to like it. Fits in perfectly with the whole industrial theme.
And that is it! Just wanted to share the new curtain project. Now, onto the next!


