Tuesday, June 8, 2010

STRAW HATS

Have you ever thought to yourself, "Man, (insert magnificent idea you haven't seen before) would be so cool - I am going to do that!" and then you turn around and find that same idea in every magazine and posted on every design blog? It's not that you think, "Hey, I thought of that first," but you realize that idea just happened to become a fast growing trend so it must have not been that "original", or "unique."

Well, that same thing happened with this trend:
[country living magazine via blueprint bliss]


[top right: martha stewart via the city stage]


I am looking for several old and floppy straw beach hats to display above the "new" to us buffet in the dining room. If you find any, let me know!

Friday, June 4, 2010

EMILIE FRIDAY: calligrapher

I discovered this calligrapher the other day and I love her work. She designs logos, address blocks, stamps, invitations - and they are all beautiful! I love her style - and it slightly resembles a style that I have been working towards. She also has an etsy shop and sells calligraphy supplies.  I really want to purchase her Spencerian Textbook Kit (intermediate) - and I just might - that comes with a book, nibs, holder, ank ink. Such a deal!

Here are some of my favories of Emilie's work:


I have been trying to perfect my own calligraphy style(s) for awhile now and I have been saving any form of inspiration I can find. I have pages and pages of cutouts in my inspiration book of samples from different artists. I have always loved to handwrite and doodle, so I took a copperplate calligraphy class a few months ago. I really enjoyed learning the basic forms, how to hold the pen, replace tips, etc. Since then, I have been working on writing a wedding invitation for a friend and designing a personal stamp to use on my design work. I will be sure to share the final results of both. For a staff picture at work we had to display an "item" that represents you - I chose my calligraphy letters in my inspiration book:

Thursday, June 3, 2010

BEACH PHOTOS

I am headed to the beach tomorrow for a friend's wedding and I just can't wait - the sandy white beaches of Destin, the glimmering sun, Crab Island, delicious seafood...and soon, oil lurking the shore while the smell of exhaust fills the air. Boo! I am glad to get this beach trip in before the oil hits the panhandle.

At least I have these photos to keep my spirits up.

Wouldn't this photo make a cute painting? [deliciously organized]


[unknown]


Ahhh to be basking in the sun like this ... [photographer Petra Van Raaij via dress, design, & decor]


Love the colors in this photo - and, don't be fooled---that is me ;) [unknown]


[unknown]

SURPRISE

I had a nice surprise waiting for me when I got to Melrose yesterday...
[check out the buds on the hostas! little purple blooms are starting to appear!]

Which soon led to...


our first dinner in Melrose at the dining table - yay! I will do a post soon on the full room, or what there is of it (not much). 

[pardon the picture quality - taken from iphone]

Wednesday, June 2, 2010

DROP CLOTH CURTAINS

I am sure that it was somewhere on blog world that I read about using canvas drop cloths for around-the-house projects, and the idea stuck in my head. I did a little google-ing and found that people make sofa slipcovers out of them and curtains. This is what I like (and read) about drop cloths:
- they are all ready HUGE
- great for long lengths or puddling at the floor
- neutral color
- thick, strong material
- no need for lining
- just hem, sew pole pockets, and iron and voila!

I purchased 2...gosh I can't even remember the size now...drop cloths for about $15 each from Lowe's and began the adventure! Luckily, my Mom was in town and was able to help me get started - good thing, because this was my first go on my sewing machine and we encountered a few problems. ;) This was our process:

1. We measured the window, where the rod would be installed, and how many inches we wanted to allow the fabric to "puddle" to determine how much we needed to hem. I think we allowed around 4-6" for puddling. 

2. We pinned the top down 2" for the pole pockets. The bottom was the raw edge so we pinned it up 1", sewed that length, then folded it another 8" for the desired hem length. 
3. Repeat for both curtains. I ironed both before I hung them and it really helped with the wrinkles and form.

Take one...


And, take two...


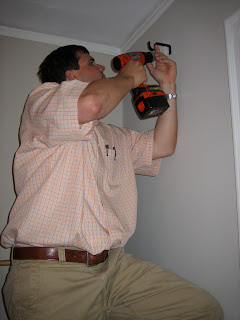
[yes, that is spackling on the wall - disregard any drywall anchors included in package when hanging a light rod, not needed! Will leave a huge hole!]

Getting close...


[click on picture to enlarge]


I really love the final product and they hit the floor perfectly. I think the thick material helps them keep their shape and look so full. I also read where others mentioned sewing a color band along the bottom to spice them up. For about $30 of fabric + a $30 rod from Target, I say you have yourself a deal and some fancy curtains!


Thanks Mom and Brandon for your help!